The renovation of new homes is a top priority for every family, and the renovation of bathrooms is particularly important. Treatments such as walls and floors are necessary, and toilets are important sanitary wares for toilets. Like sanitary facilities such as washbasins and shower rooms, the installation is very important. Whether the installation of toilets meets the requirements directly affects daily home life. So, the following Xiao Bian talks to everyone about how to install the toilet and the toilet installation method . Let's take a look.
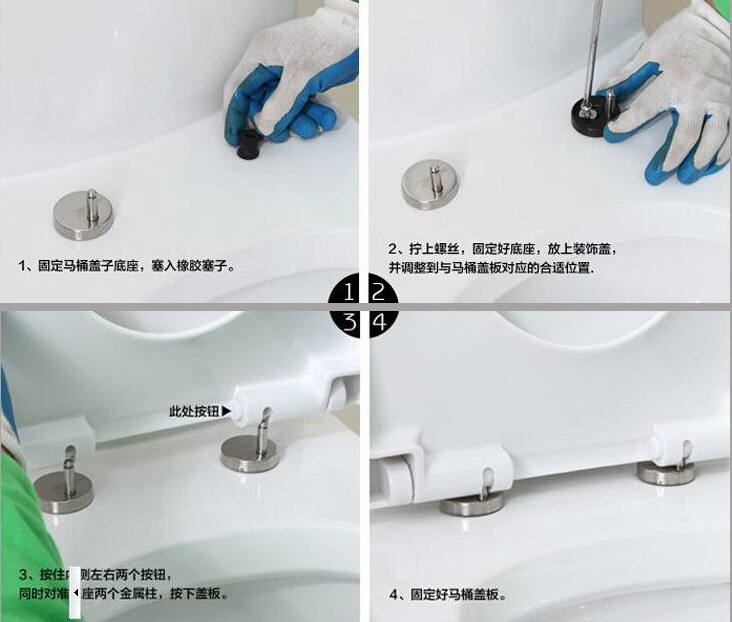
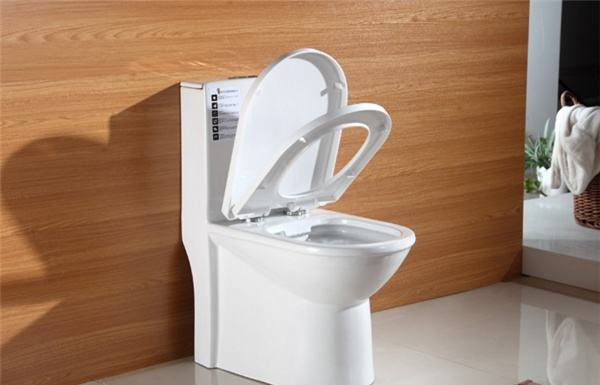
Toilet installation method illustration
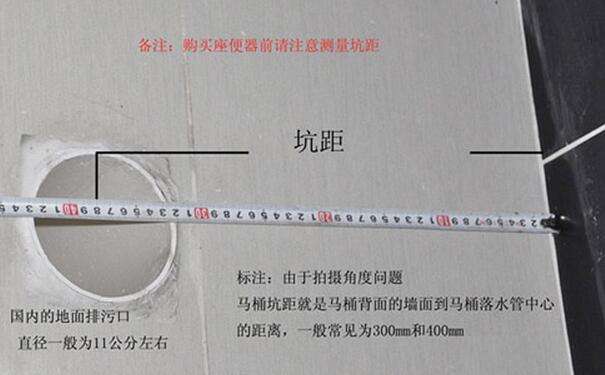
1. Before choosing a toilet in the market, first determine the size of your own toilet (that is, the distance from the drain to the wall). Before installation, make sure the product accessories and instructions you choose are complete. Take a close look at the instructions and learn about some product issues.

2, according to the situation of the toilet to determine how high the outlet stays, cut the rest. The purpose is to make the pipe and the bottom of the toilet more consistent. First use a hacksaw or a cornea with a height of 0.5 cm, because the flange of the toilet is soft. If the height is not higher than 0.5 cm, water seepage may occur, and a 0.5 cm fit is more stringent.
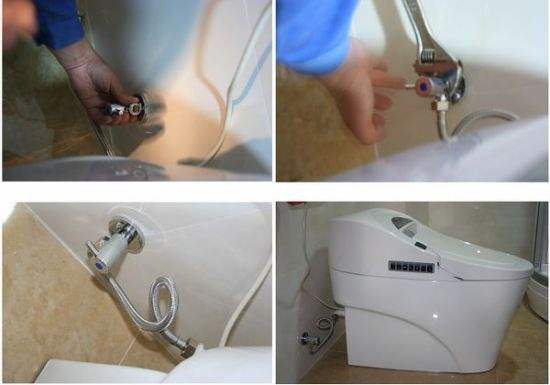
4. Install the flange ring that is delivered with the toilet bowl at the water outlet. Remember to press hard to ensure the firmness of the flange ring and the toilet water outlet. Put the flange on the toilet drain pipe. Then carefully aim at the water pipe and put it down smoothly. At this time, the pipe wall of the water pipe will be inserted into the adhesive clay of the flange to play a sealing role.
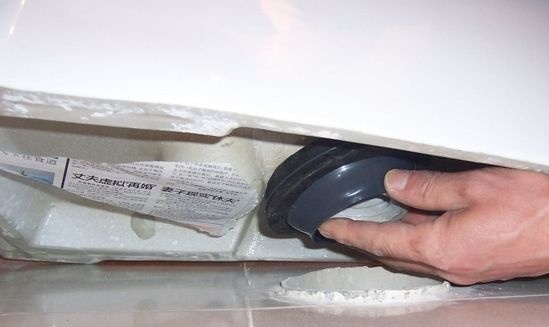
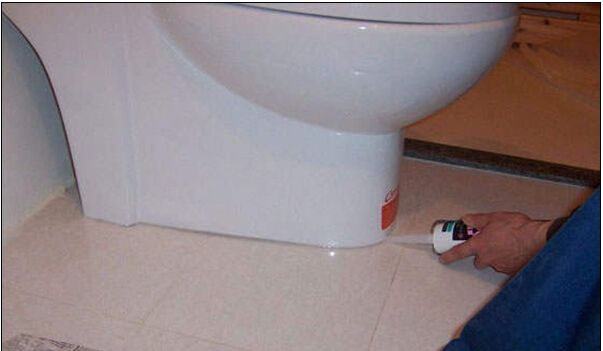
6, to glue the toilet around the treatment, this step is also very important, not only play a role in the stability of the toilet, but also to prevent the escape of the odor from the toilet release. Therefore, not only to fight, but also to fill the entire four weeks. At the confluence of the toilet bowl and the outer surface of the floor, because the toilet bowl is not integrated with the ground surface, it can be mixed with a transparent sealant to seal the outer mouth of the toilet so that it can maintain its integrity with the floor surface. Part of the toilet water can be blocked at the periphery of the toilet.
Note: If you need to install the anchor bolts, use the special sealant installed on the toilet to apply evenly at the outer 2CM of the toilet drain outlet. The water outlet of the toilet should be facing the central position of the drainage pipe. The position of the bulge on the right and left side of the toilet seat, take the toilet, punch, and bury the bolster. Note that this new punctured bulge embeds the hole and may break the waterproof layer. It is recommended to bury the expansion screw. At the same time, fill in the sealant around the hole, and then bury the bolt, first screw the expansion bolt, let the expansion bolt fully open, strengthen its pull, and then screw the upper screw, put the toilet , and then directly screw the screws, caps, in order to maintain the overall appearance.
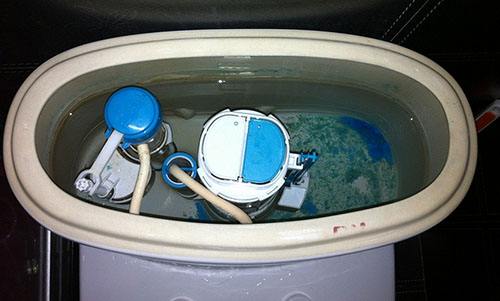
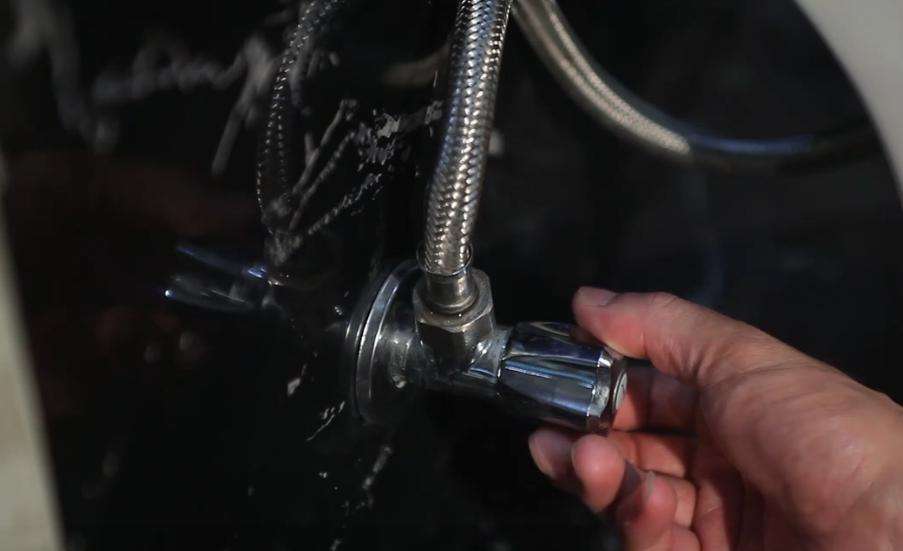
7, install or debug tank accessories. Check the water pipe first, flush the pipe for 3-5 minutes to ensure the cleanness of the water pipe, install the angle valve and connection hose, and then connect the hose to the inlet valve of the installed tank fitting and press the water source to check the water supply. Whether the valve inlet and seal are normal, check whether the installation position of the drainage valve is flexible and whether there is any jamming or leakage, and check whether there is any leakage inlet valve filter device.
8, after the installation of the toilet should wait until the glass glue (putty) or cement mortar curing can be used after the release of water, curing time is generally 24 hours.
Toilet installation considerations
1. When installing the toilet, do not pour cement mortar into the cavity or other cavity before the toilet to avoid cracking the toilet due to the condensation of cement.
2. The water outlet requires the installer to handle the leveling. The bottom of the toilet should be installed with a special flange for the toilet, or the glass glue should be applied evenly with the water outlet. The bottom of the toilet and the surrounding area should be glued. The gap between the toilet and the wall should be uniform and placed. Correct and stable.
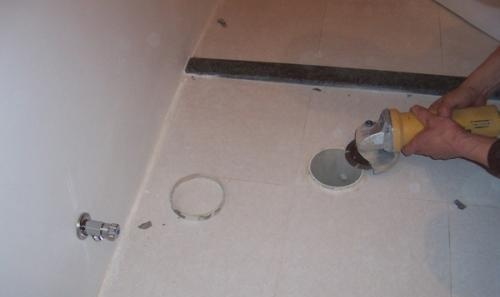
3, according to the bathroom on the ground, adjust the height of the toilet seal. The low height of the water seal at the bottom of the toilet may cause an unpleasant smell in the bathroom and affect health. If it is too high, the surface of the water is prone to splashing. Therefore, the height of the individual needs to allow the manufacturer to adjust the water seal to a suitable position. If the toilet is not returned from the pit, the decoration team will raise a block, make a gutter, and then do waterproofing; or buy a drain converter fitting to connect. However, any change in the abnormal installation will destroy the vacuum suction of the toilet, affecting the original speed of the sewage and the effect of the odor. If the toilet and drainage hole you bought are really not good, it's best to ask the dealer for a suitable one. If you need to do a toilet drain, or if you want to move the existing toilet, you must raise the floor so that the horizontal walkway has a slope, which will make it easier to remove the dirt. But try not to move the position of the toilet, otherwise it will cause blocking.
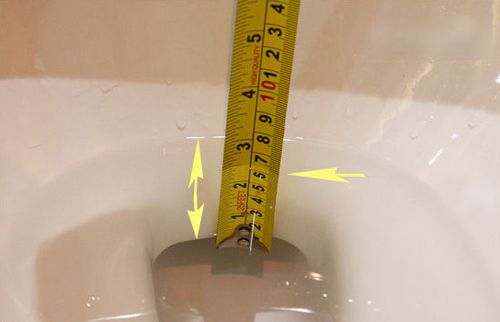
(Schematic diagram of water seal height)
4, the installation of the toilet can not be completed by itself, it needs a variety of calculations and forecasts. General installation before the installation of the master will conduct a comprehensive inspection of the sewage pipeline to see if there is silt, waste paper and other debris plugged in the pipeline, while checking the level of the toilet seat before and after the level is horizontal, if found uneven, when installing the toilet The ground should be leveled.
The above is about the toilet installation method graphic knowledge, we must have more understanding of how to install the toilet, buy the toilet is actually only a semi-finished product, if not installed, the product itself is no matter how good quality, life is still Troublesome. Therefore, it is necessary to pay attention to choosing a toilet, and it is necessary to pay attention to the toilet. For more information, please visit this website. Stay tuned.
Toilet bowl installation method illustration
Cob Landscape Light,Cob Cree Led Light,Cob Cree Led Garden Spotlight,Garden Spotlight Led Light
Shenzhen Poolux Lighting Co., Ltd. , https://www.pooluxled.com